- Sign in to Elephango using your username and password.
- You do not need to do anything on the site yet. You will need to be logged in for a later step.
- Log on to Edovate using your username and password.
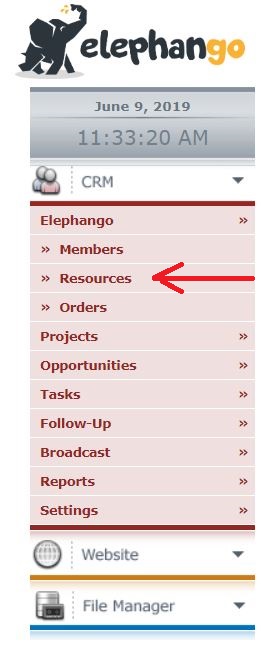
- Open the CRM options and click on Resources (red arrow).
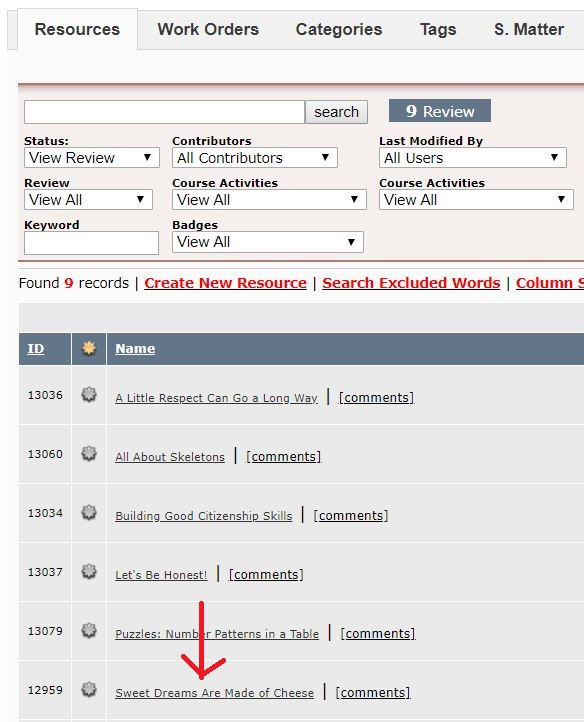
- The main Resources tab will open, showing how many lessons are in Review (purple underline).
- Use the drop-down menu (red arrow) to select View Review.
- Click on search (blue arrow).

- All new lessons requiring a Review will be listed.
- Click on the Name of the lesson you want to review (red arrow).
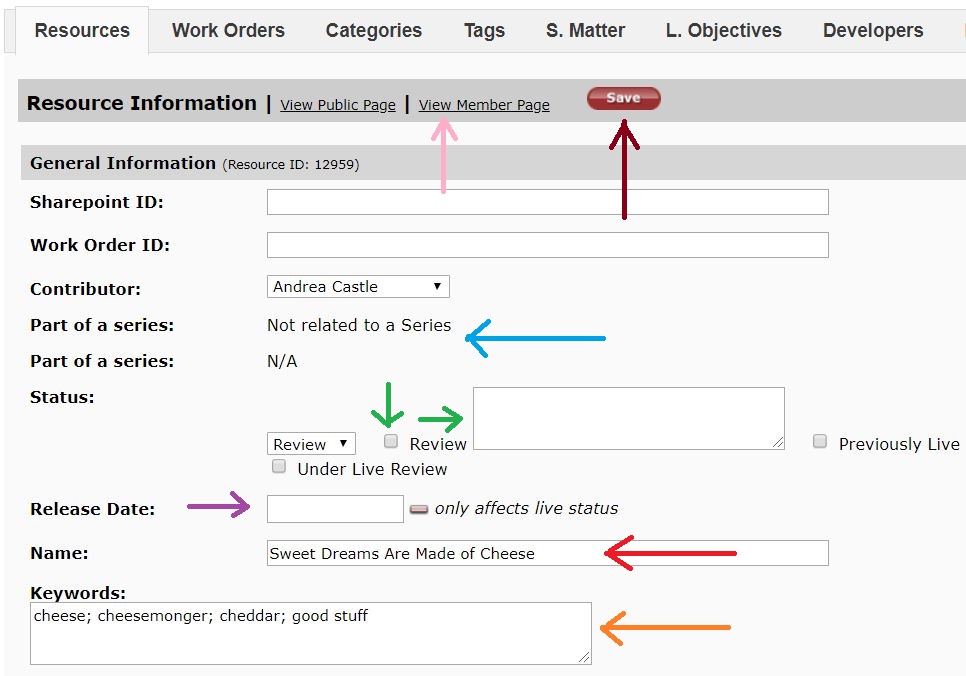
- This will open the Resource Information.
- The lesson Name (red arrow) is its title. Correct any errors.
- If the lesson is part of a series of Related Lessons, it will be noted (blue arrow). You may disregard this.
- There may be a Release Date (purple arrow). You may disregard this.
- You should see Keywords for the lesson (orange arrow). These are only viewable to the Administration and assist us in locating lessons on certain topics. Feel free to add any keywords while reviewing the lesson.
- If the Review box is checked, you will also see notes in the Review box (green arrows). Read these notes to see if they pertain to your review process.
- If you have made any changes (perhaps to the Name or Keywords), you must click Save (brown arrow).
- Click on View Member Page (pink arrow) to open the lesson on Elephango.com. [Note: If you did not log on to Elephango in step 1, you will need to do so and click on View Member Page again.]
- When the lesson opens in Elephango, you should see an image on the left and information on the right.
- Scroll down to the Get It! section.
- The first section (red bracket) is the Hook for the lesson.
- The second section (blue bracket) is the Get It! section, also known as Area 1.
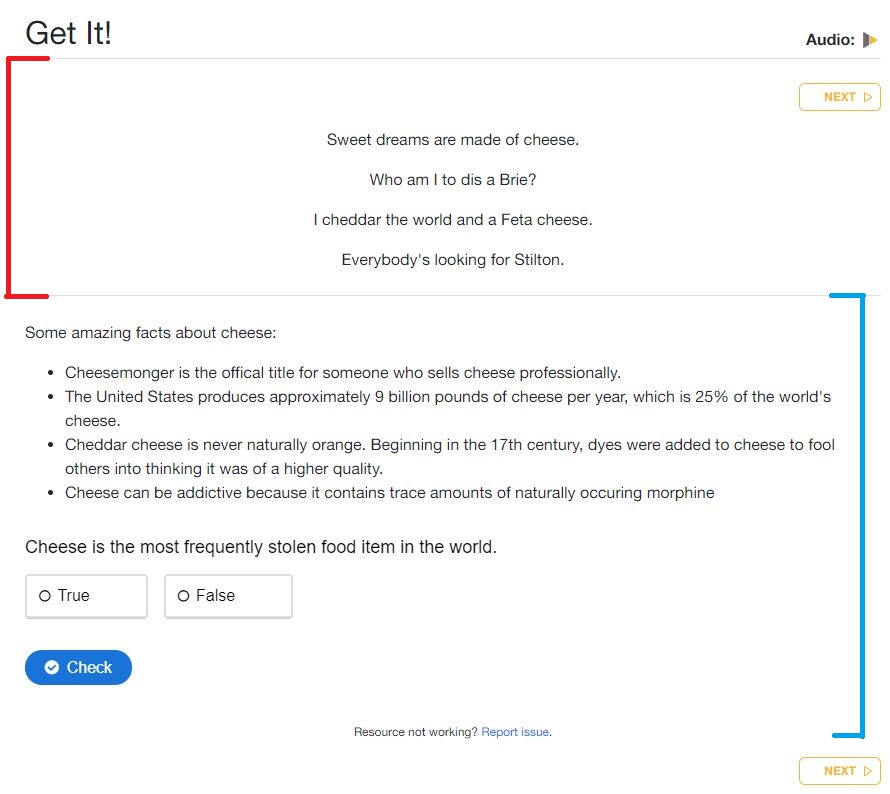
- Review the content.
- Check for the obvious (grammar, spelling), word choice, and voice.
- Check that Elephango formatting is followed, such as using bold and italics.
- You may also check for accuracy if something seems incorrect.
- If you need to make an edit, go back to Edovate.
- Find the Area Content needed and click on Click here to edit this Content. (Red arrow example for Hook Content.)
- Follow the directions in the Make Changes to a Lesson in Edovate Knowledge Base page.
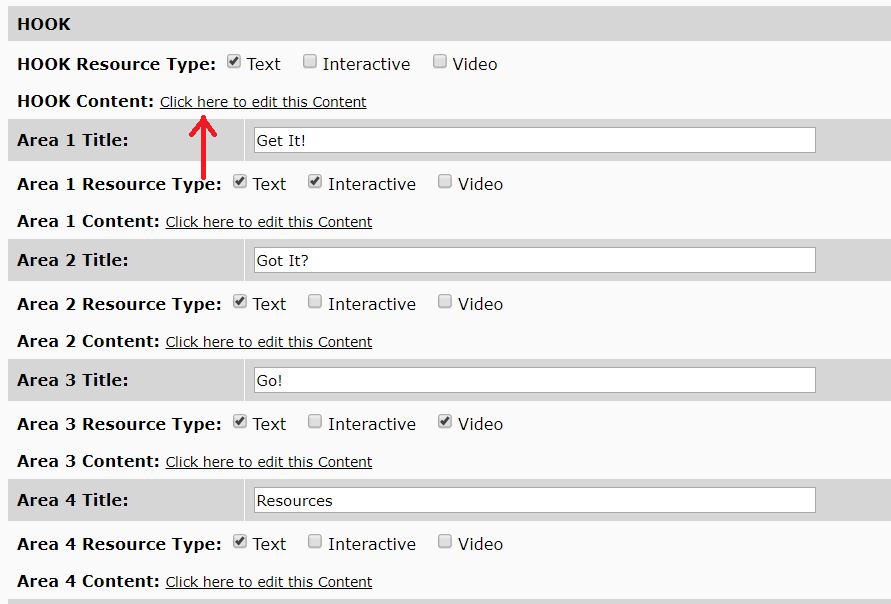
- Review all Area Content in this fashion.
- Check every outside resource included throughout the lesson and make any required edits.
- Ensure the link opens in a new window.
- Ensure the exact resource title is included in the lesson.
- Check any Downloadable Resources.
- Click on the title to open (red arrow).
- Review the document for accuracy and format.
- Ensure that the Elephango footer does not cover any text.


- If any changes are needed on a Downloadable Resource, follow these steps.
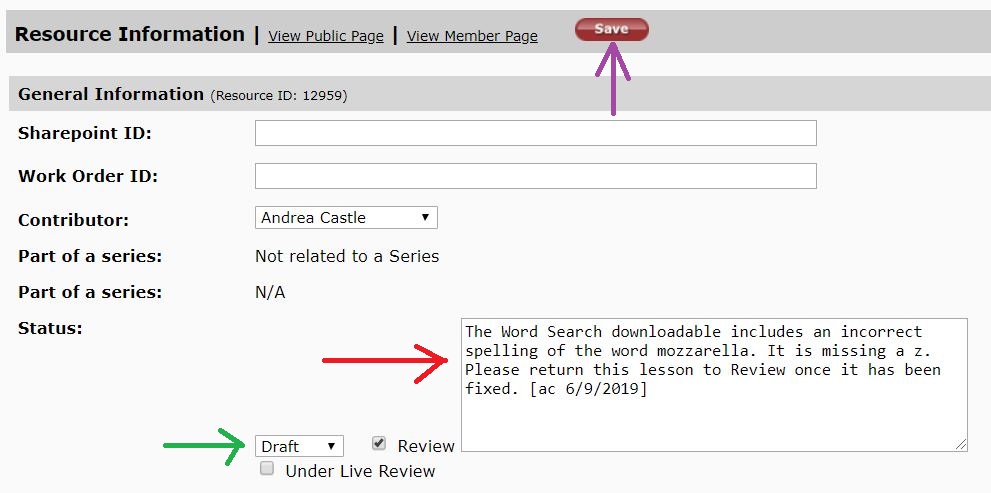
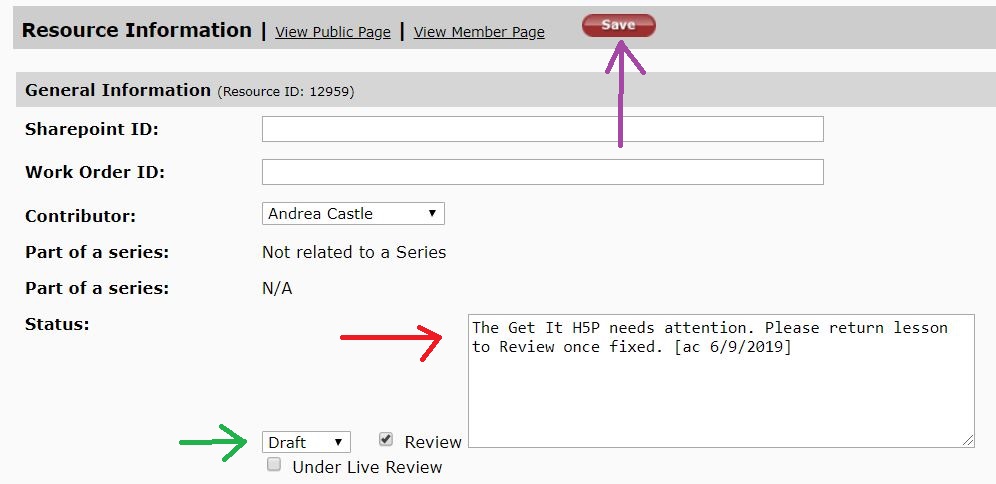
- Enter a detailed note in the Edovate Review Box with the error(s) and whether or not you want to review this lesson again. Be sure to include your initials and the date as well. (red arrow)
- Use the drop-down menu to change the lesson Status to Draft (green arrow).
- Click Save (purple arrow).
- Check any embedded videos.
- Ensure the student is instructed to watch the video in some fashion.
- Click to play the video. If the video does not play properly, follow these steps.
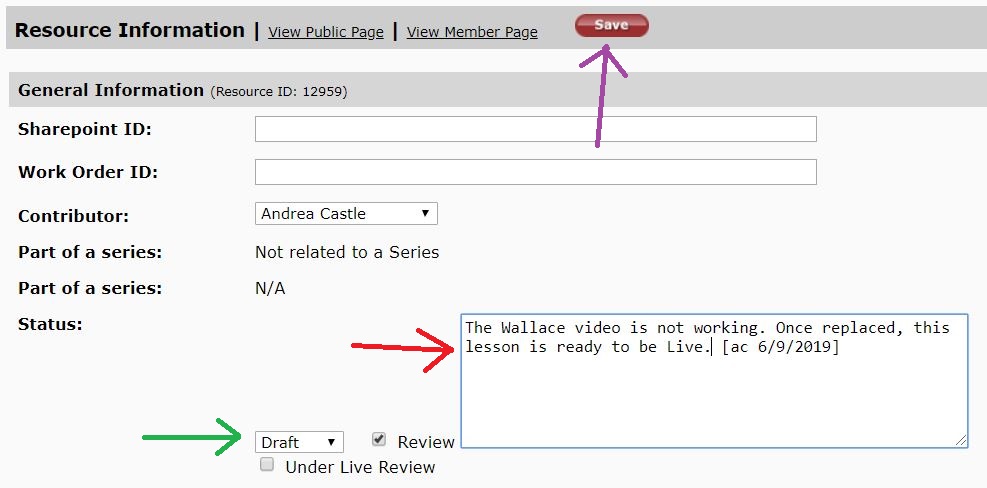
- Enter a detailed note in the Edovate Review Box with the error(s) and whether or not you want to review this lesson again. Be sure to include your initials and the date as well. (red arrow)
- Use the drop-down menu to change the lesson Status to Draft (green arrow).
- Click Save (purple arrow).
- Check all interactives to ensure the following.
- They work as intended.
- There are no typos, grammatical errors, etc.
- All answers seem accurate.

- If you discover an error in an interactive, follow these steps.
-
- Enter a detailed note in the Edovate Review Box and whether or not you want to review this lesson again. Be sure to include your initials and the date as well. (red arrow)
- Use the drop-down menu to change the lesson Status to Draft (green arrow).
- Click Save (purple arrow).
- Check the Sources drop-down in the right-hand sidebar. If it does not comply with How to Add Sources, make a note in the Review box as noted above.
- Return to Edovate and check that all Filter Information is completed and matches the lesson.

- Return to Edovate and check that the Categories have been selected and match the lesson.
- The Breadcrumb Display Category and Category 1 should be the same (red arrows).

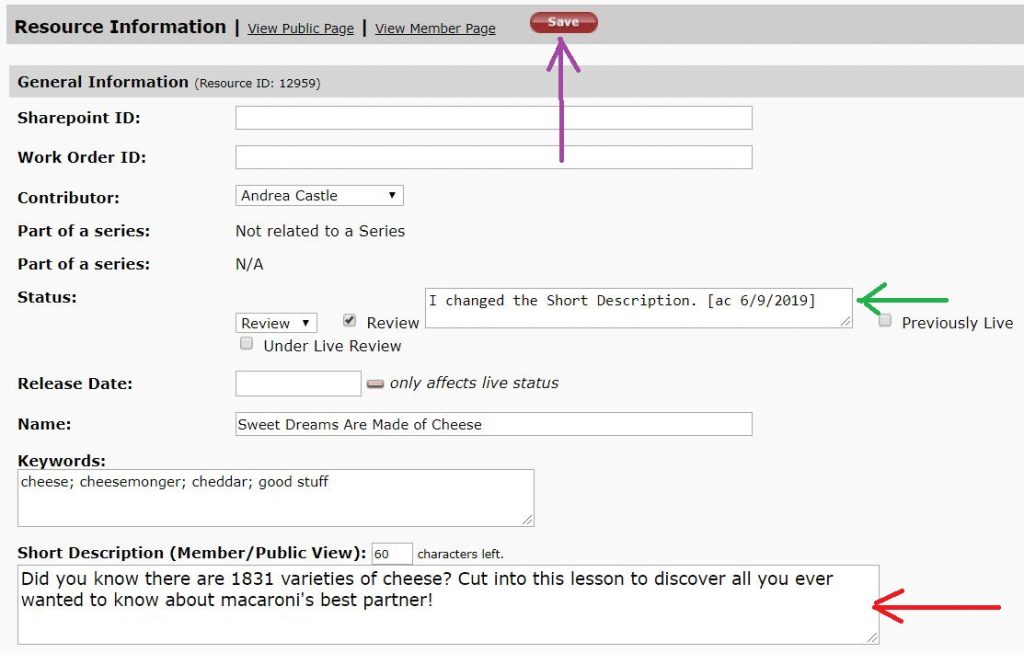
- Review the Short Description at the top of the page.
- Does it generate excitement for the lesson?
- Could it be improved?
- You cannot save versions of the Short Description, so simply type in your changes (red arrow).
- Make a note in the Review box (green arrow) and click Save (purple arrow).
- When the lesson is ready, make it live!
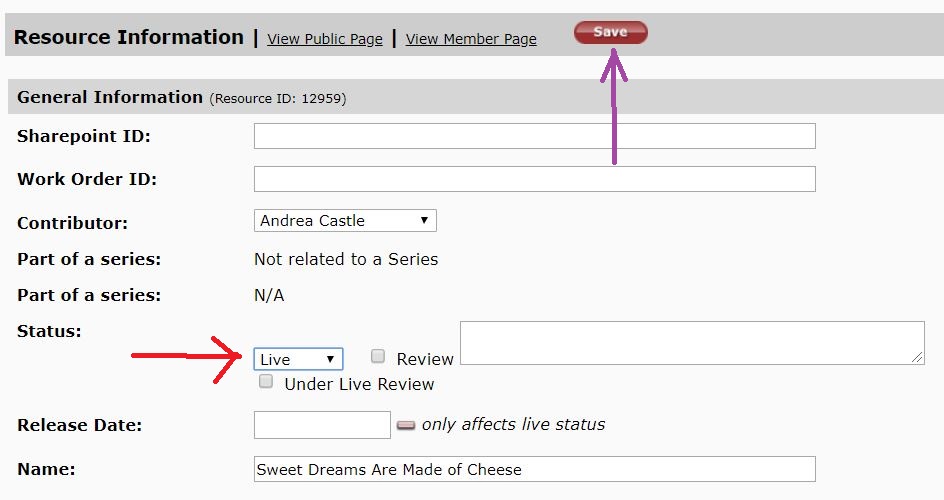
- Use the drop-down menu to change the Status to Live (red arrow).
- Click Save (purple arrow).
- You may then close the Edovate window.
