You must log In to the Elephango H5P WordPress site. Follow the username and password protocol.
UN: jSmith_H5P
PW: jS90210H5P
Follow the link provided by the developer to access the previously created H5P.
NOTE: If the developer only included instructions to create an H5P or you have an idea for an additional H5P, follow the steps to develop new H5P Interactives.
Review and Edit
Review the entire H5P and make all required edits to align with Elephango style and content guidelines. (See H5P Interactives on how to work within an H5P.)
Add any images or videos using the Create and Add Images and Embed Videos guides.
Ensure all content meets copyright rules and is properly cited, as explained below.
Embed and Backup
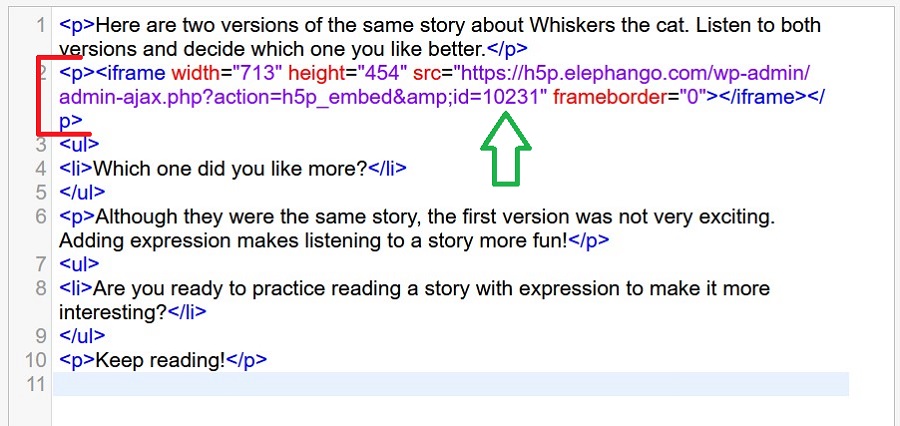
When the H5P is ready, embed it into the lesson. You will need the H5P ID number (green arrow).

- Copy and paste the following HTML code into the HTML version of the lesson.
<p><iframe width=”713″ height=”454″ src=”https://h5p.elephango.com/wp-admin/admin-ajax.php?action=h5p_embed&id=#” frameborder=”0″></iframe></p>
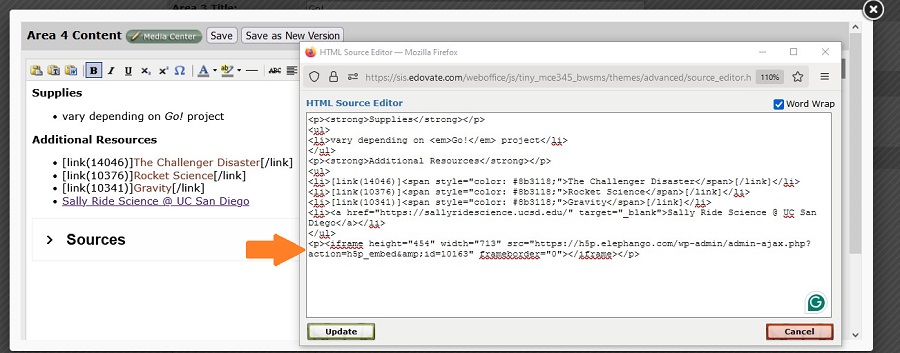
If you use the HTML Source Editor, this code is at the bottom of the page (red arrow).

- Replace the # sign in the code with the H5P ID number (green arrow).
- Ensure the correct H5P appears in the lesson and works properly.
You must also save a backup of the H5P to ClickUp.
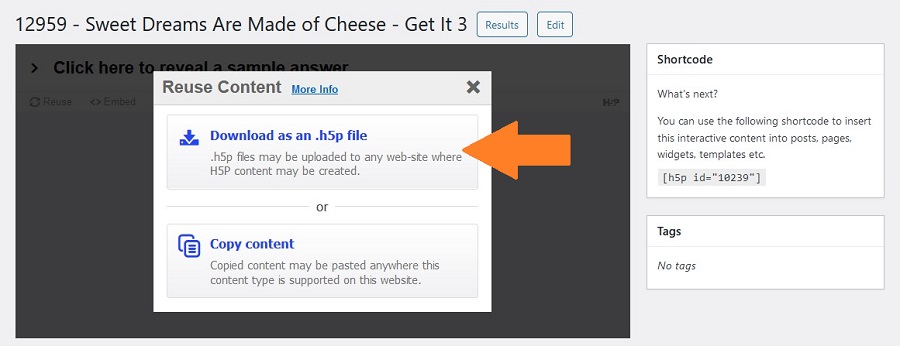
- Click Reuse (blue arrow).

- Click to Download as an .h5p file (orange arrow). The file will download to wherever you save your downloads on your computer.
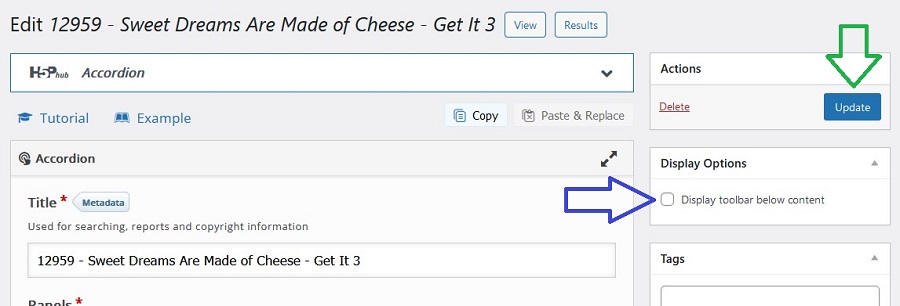
- Click to Edit the H5P again.
- Click the box next to the Display toolbar below content to remove the check mark. The options below will automatically uncheck and disappear. (blue arrow)
- Click Update (green arrow).
The Reuse and Embed buttons should now be gone.

- Follow the Using ClickUp directions to add the H5P file to ClickUp as a backup.
Create and Add Sources H5P
Everything not generated solely by the developer must be cited. (See Copyright and Plagiarism.)
The developer should have all sources listed with the required information in the Resources section of the lesson.
The exact name or title of the item with its URL hyperlinked. This is placed in quotation marks, followed by a period.
The exact names of whoever created the item, followed by a period.
The date the item was created or, if unavailable, the date you accessed it, followed by a period.
The complete name of the website where the item is located is in italics, followed by a period.
Any licensing information and the required URL hyperlinked, followed by a period. (HINT: The YouTube terms of service hyperlink is saved at the bottom of the HTML Source Editor.)
Any modifications made to the item, followed by a period.
Ensure all the information is correct, accurate, complete, and all links work.
Copy and paste this information into an Accordion H5P entitled ID – Title – Sources.
Format as follows.
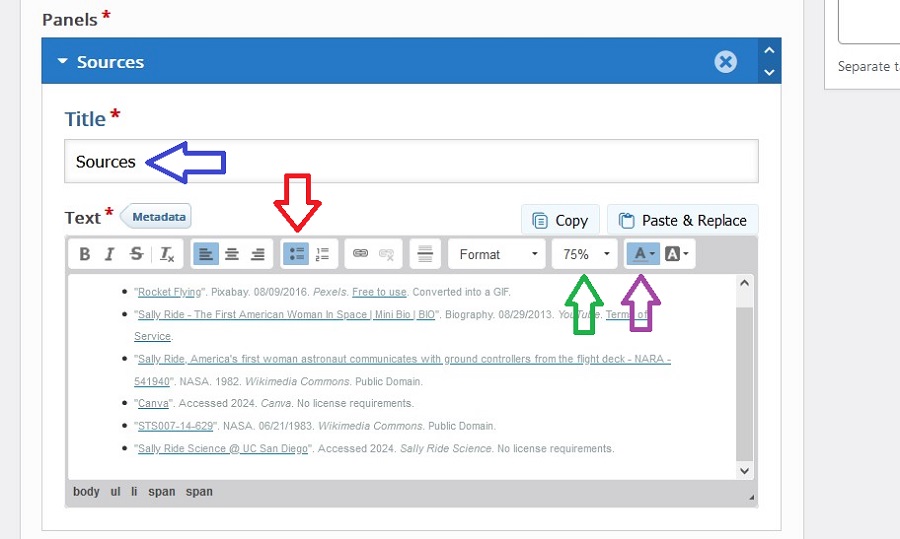
- Title the H5P itself as Sources. (blue arrow)
- Make it a bulleted list. (red arrow)
- Reduce the font size to 75%. (green arrow)
- Set the font color to the gray square in the second-to-last row, third from the right. (purple arrow)
Embed the H5P at the end of the lesson’s Area 4: Resources section. (orange arrow) You do not mark the Interactive box for that area.
Check the lesson to ensure it is accurate. Properly citing our sources is one of the most important aspects of this job.

