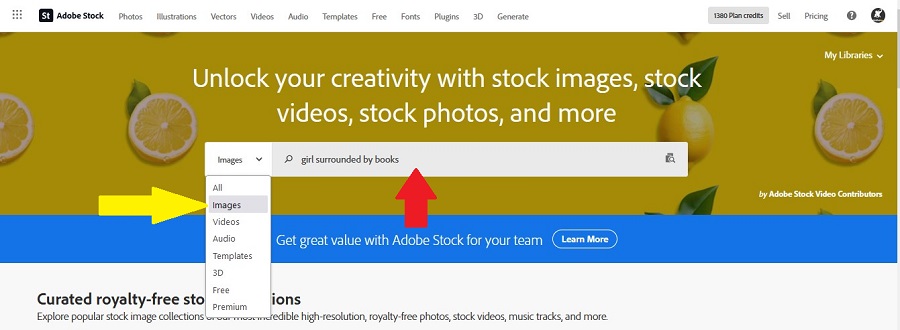
Adobe Images
Log on to Adobe Stock using the account information shared with you.
- Follow the direct link provided by the developer, type the image number into the search field, or use the search field to find an appropriate image. (red arrow)
- Make sure you have Images selected. (orange arrow)
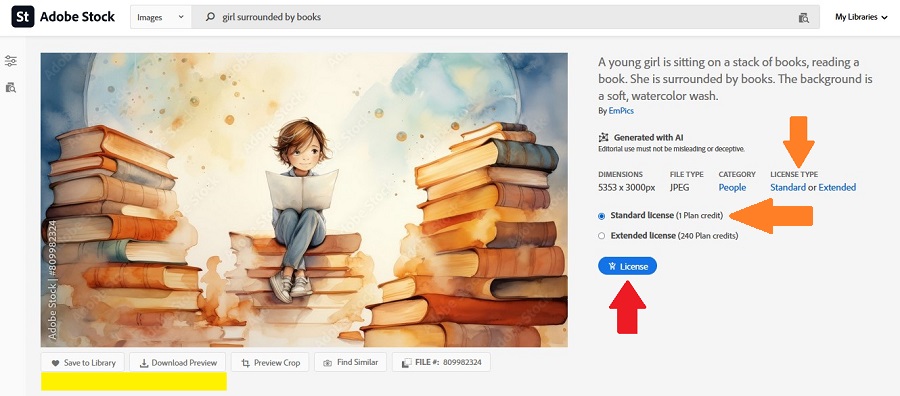
- The License Type must be Standard. (orange arrows)
- If the image is Editorial Use Only, a notice will appear where the yellow box is below. These cannot be used.
- Click to License the image. (red arrow) It will download to your device.
- Open the image with your preferred program. Resize it to 2000 pixels if this is the main lesson image (red arrow) or 900 pixels for everything else (green arrow).
These will be the files to save in ClickUp.
Vector Images
Adobe also licenses vector images, which is particularly useful when creating original graphics or adding images to a drag-and-drop H5P.
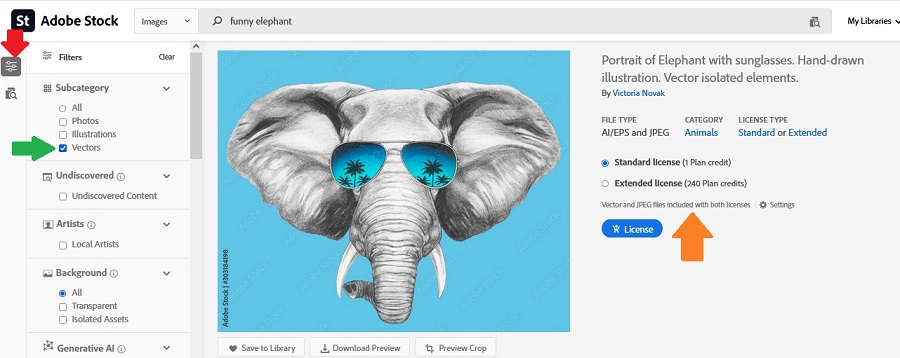
To search for vector images, open the lefthand sidebar in Adobe (red arrow). Click the Vectors box (green arrow) and confirm the image you want is available as a Vector and JPEG (orange arrow).
When you click on Download, a dialogue box will appear. Click Vector before clicking Download.
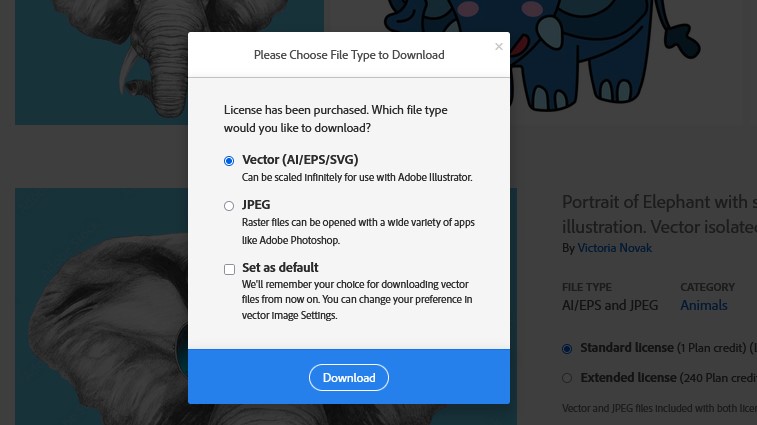
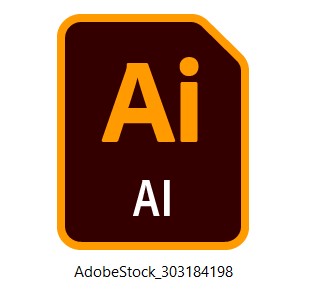
The download will be an Adobe Illustrator file, so you will need access to this software to open and manipulate the photo. Please contact Andrea Castle for assistance.
Other Images
Review Copyright and Plagiarism to ensure the image can be used.
If you alter the image, it must be noted in the citation.
Example: “He-Atom-Bohr“. MikeRun. 04/20/2019. Wikimedia Commons. CC BY-SA 4.0 license. Arrow added.

You must save the original file in ClickUp.
Main Lesson Image
This must be an Adobe-licensed image.
Note: You may request that an exception be made for AI-generated images.
Every lesson has the following three versions of the main image.
Thumbnail Image (192px by 108px)
Full Image (713px by 500px)
Cover Image (1920px by 760px)
Log on to Canva.
- Click Create a design (red arrow) and then select to do so via Custom size (yellow arrow).
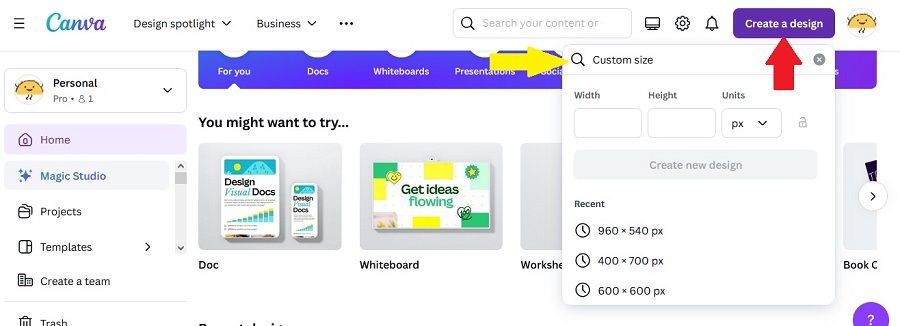
- Create three designs using the exact pixel measurements above. Note: You only need to create these the first time because you can continue to use them in the future.

- Open the Full Image design.
- Click on Uploads in the lefthand sidebar. (white arrow)
- Click on Upload files. (red arrow) Select the 2000px version of the image you previously saved and upload it.
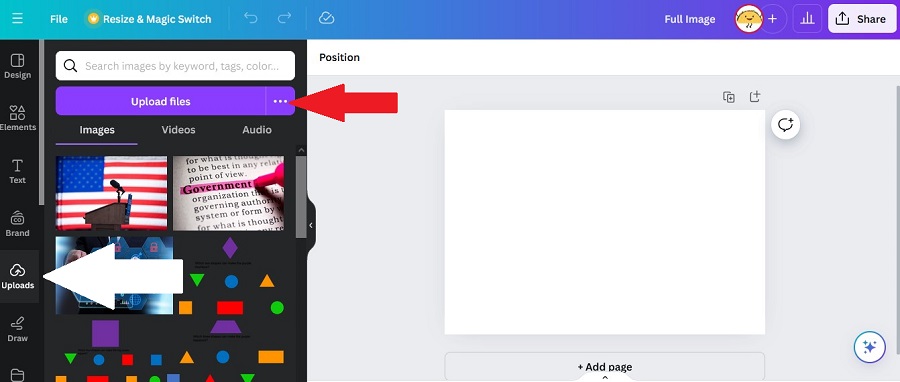
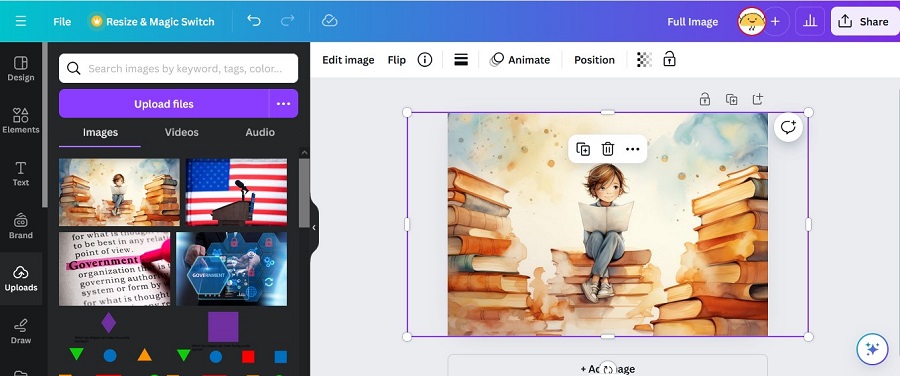
- Click on the image to add it to the design. (white arrow)
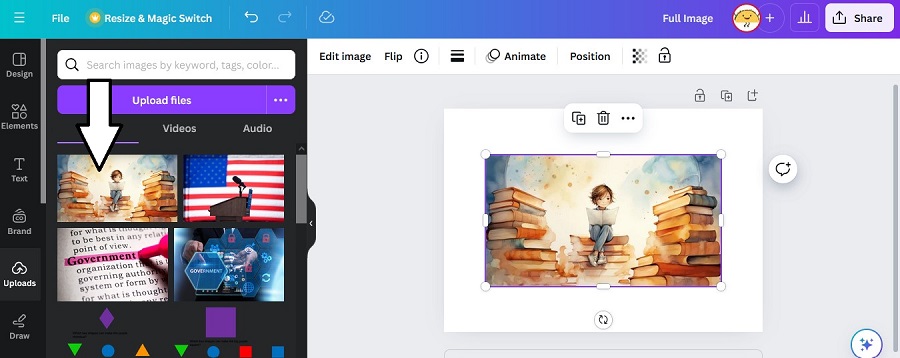
- Resize and move the image to fill the entire space and make it look good.
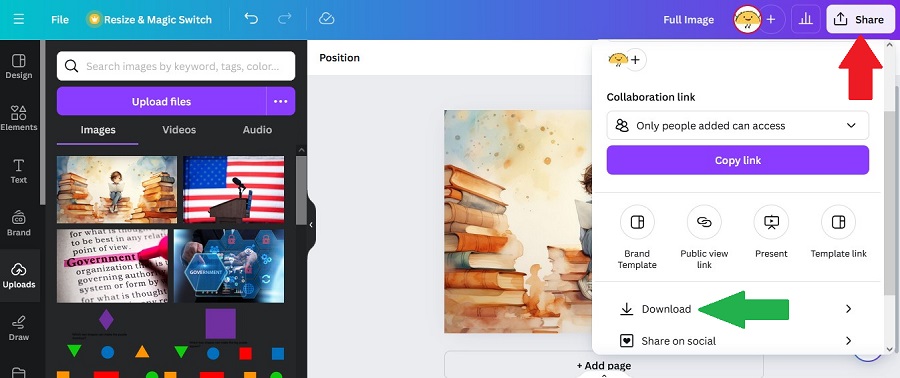
- Click on the Share button. (red arrow)
- Click on the Download button (green arrow)
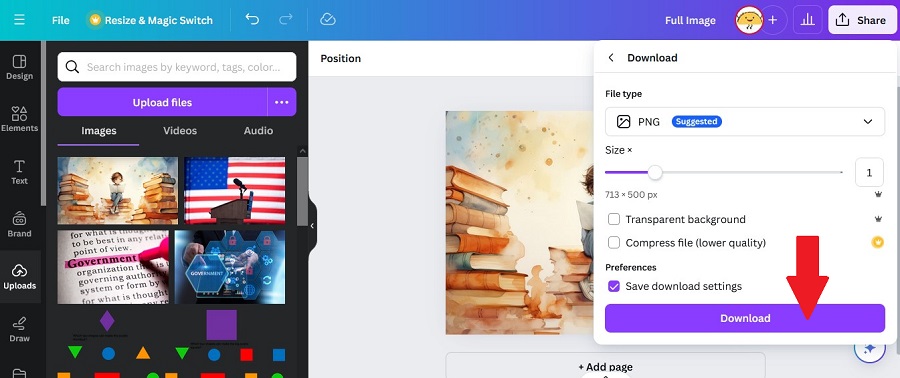
- Click the Download button to save the image to your device.
- Repeat steps 6-10 for the Thumb Image and the Cover Image.
- Rename each image with a simple title that delineates its size.
Example: girl-reading-13967; girl-reading-13967-thm; girl-reading-13967-cvr
- Go to the lesson in Edovate SIS. Scroll down to the Images section. Use the Browse button to add each image where it belongs. (red arrow)

- Scroll to the top and click Save. (green arrow)

- Check that the images are saved properly both in Edovate and on Elephango.
Lesson Images
Images used within the lesson must be saved at 713px horizontally. (red arrow)
Note: If using an outside image is not large enough, save at its largest horizontal pixel.
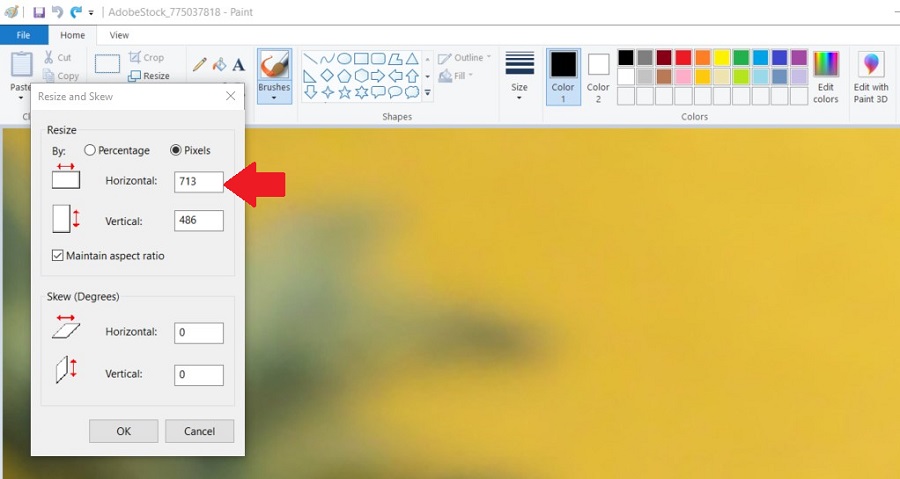
Save this version with a simple title and the lesson ID number. (red arrow)
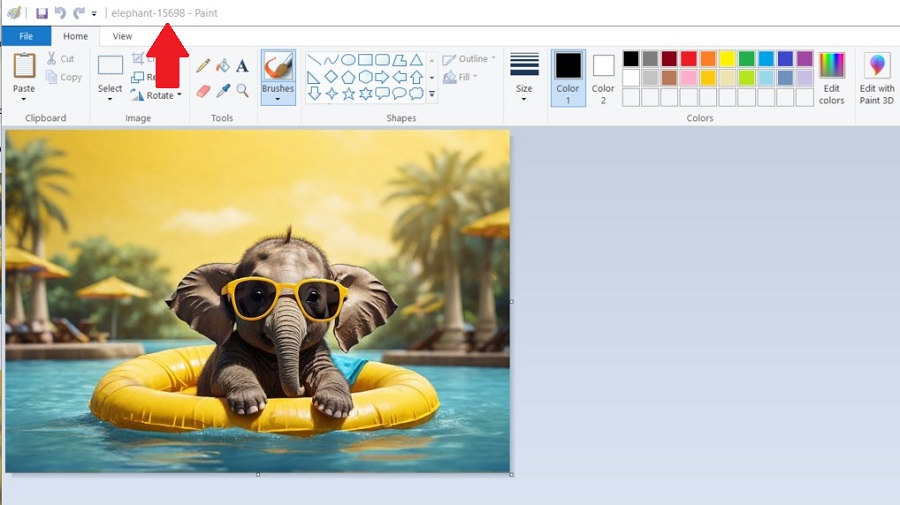
Note: The original file with its original title, including the Adobe license number if applicable, is the version to save in ClickUp.
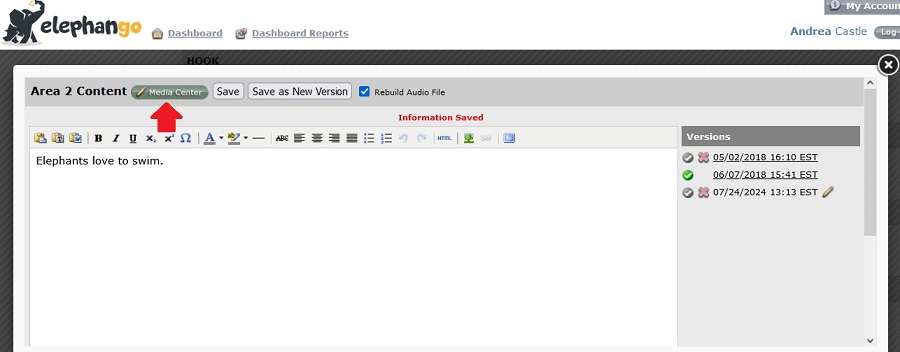
Follow these steps to add the image to the lesson.
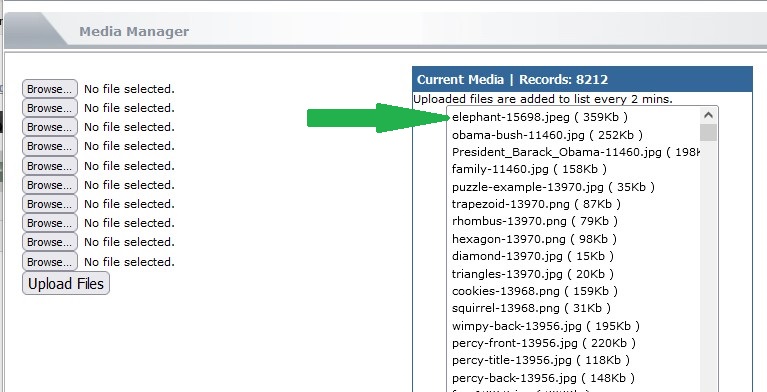
- Click on the Media Center button. (red arrow)
- Use the Browse buttons to add the image(s). (red arrow)
- Click Upload Files to upload the image(s) to the Media Center. (green arrow)
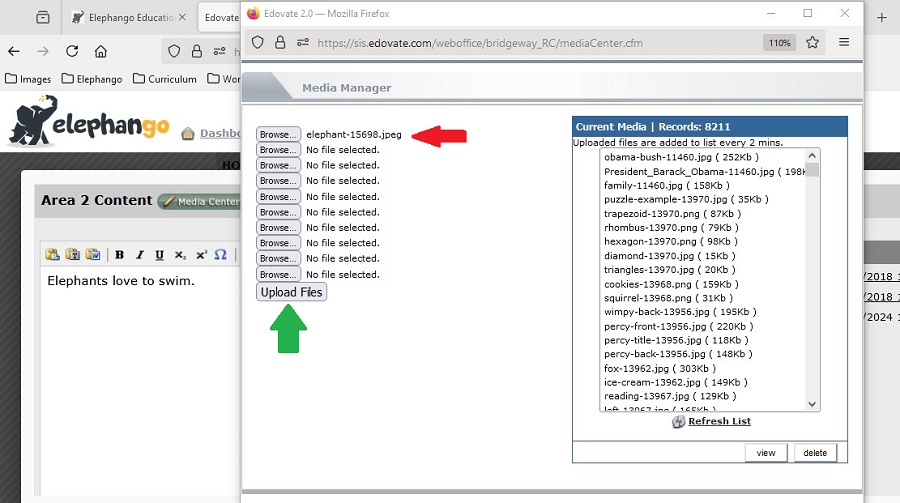
- Verify the image(s) file(s) now appear under Current Media.
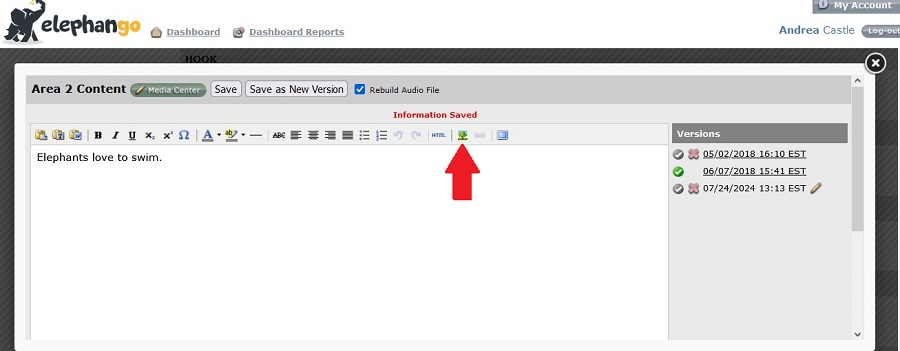
- Place your cursor where you want to insert the image. Click on the tree icon button to insert an image. (red arrow)
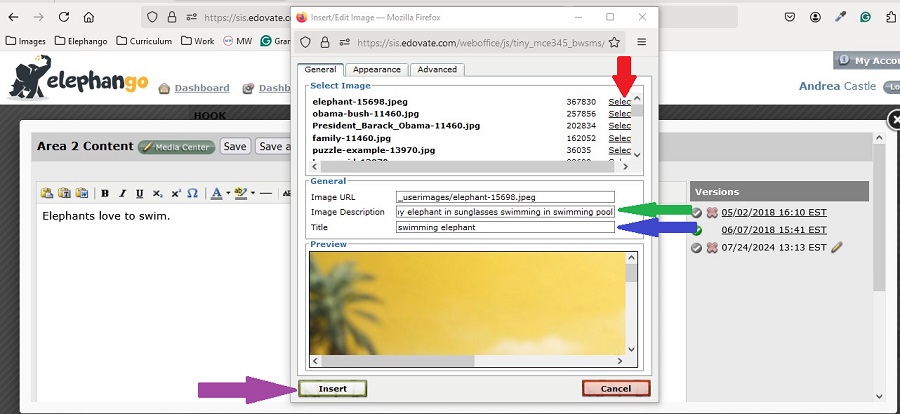
- Click Select for the image you want to insert. (red arrow)
- Add a detailed Image Description. (green arrow) This is what the accessibility reader will use to describe the image to a user who cannot see it. Often, the description provided by Adobe is a good place to start.
- Add a brief Title. (blue arrow) This will appear when the user hovers over the image.
- Click Insert. (purple arrow)
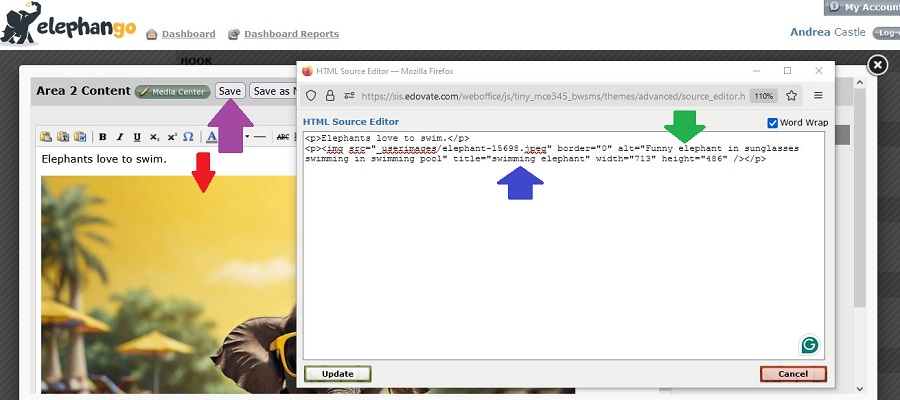
- Confirm the image appeared where intended. (red arrow)
- Open the HTML to verify that the image description (green arrow) and title (blue arrow) appear accurate. You can make any required changes directly to the HTML; just click Update to save them.
- Close the HTML box and click Save. (purple arrow)
H5P Images
You may add images to H5Ps as you saved them originally: at 900px and with the official image title.
Each interactive is different. However, if there is a spot for Alternative text, add a detailed image description (red arrow). If there is a spot for Hover text, add a brief title (green arrow).
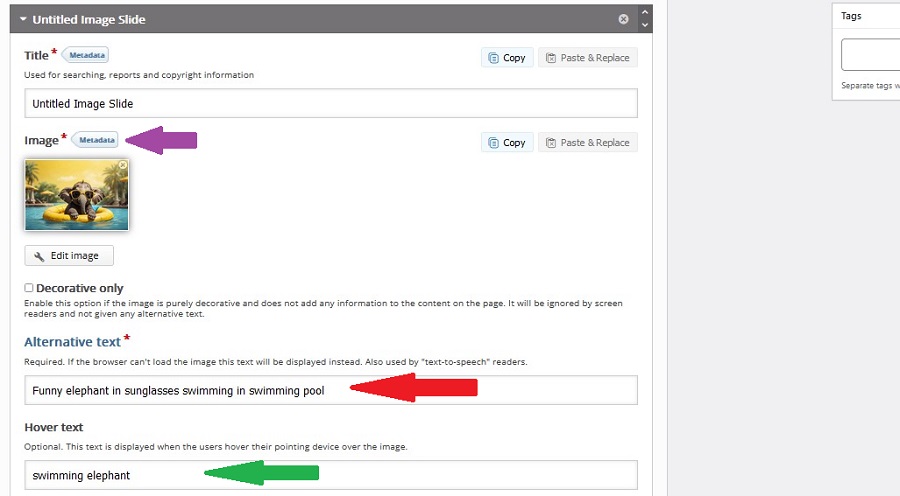
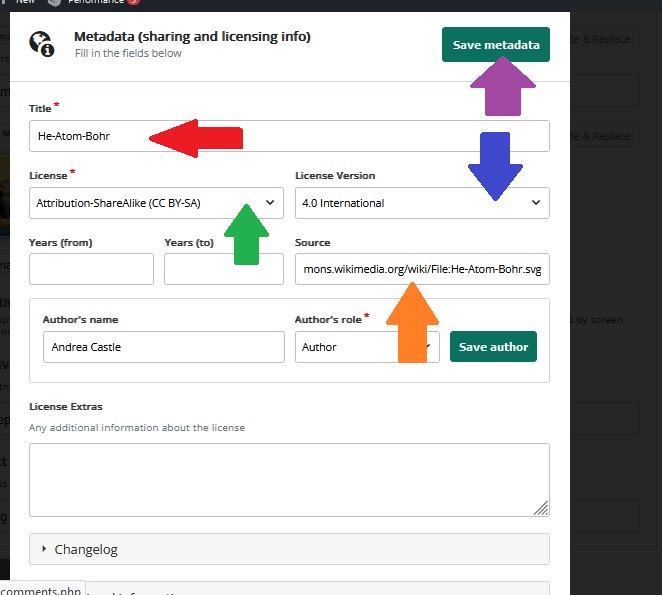
Please also click to add Metadata if the option is available. (purple arrow above)
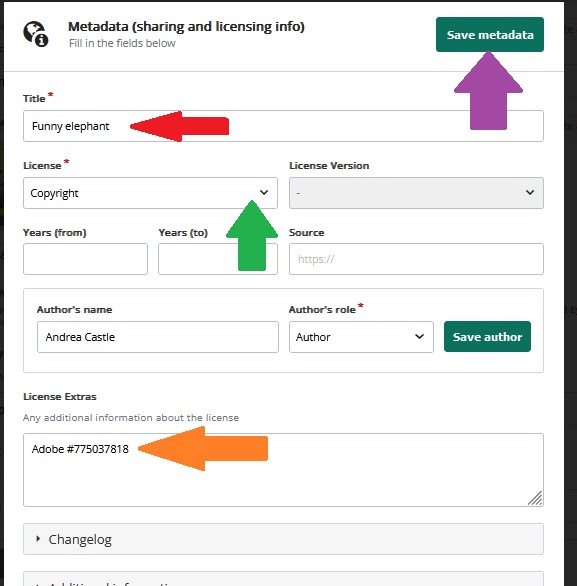
For an Adobe image, complete the following.
- Type Adobe’s title for the image in the Title field. (red arrow)
- Use the drop-down to select Copyright for the License. (green arrow)
- Add the Adobe license number to the License Extras box. (orange arrow)
- Click Save metadata. (purple arrow)
For all other (non-original) images, complete the following.
- Type the title for the image in the Title field. (red arrow)
- Use the drop-down to select the current License (green arrow) and License Version (blue arrow)
- Copy and paste the image URL into the Source box. (orange arrow)
- Click Save metadata. (purple arrow)
